
Embroidery Digitizing transforms artwork, logos, and lettering into a stitch-based format that an embroidery machine can read. The quality of the final embroidery depends heavily on choosing the right stitch types for each part of the design. Different stitches create different textures, coverage levels, outlines, and visual effects.Understanding stitch types is important for anyone involved in custom embroidery, apparel decoration, patches, caps, uniforms, or promotional products.
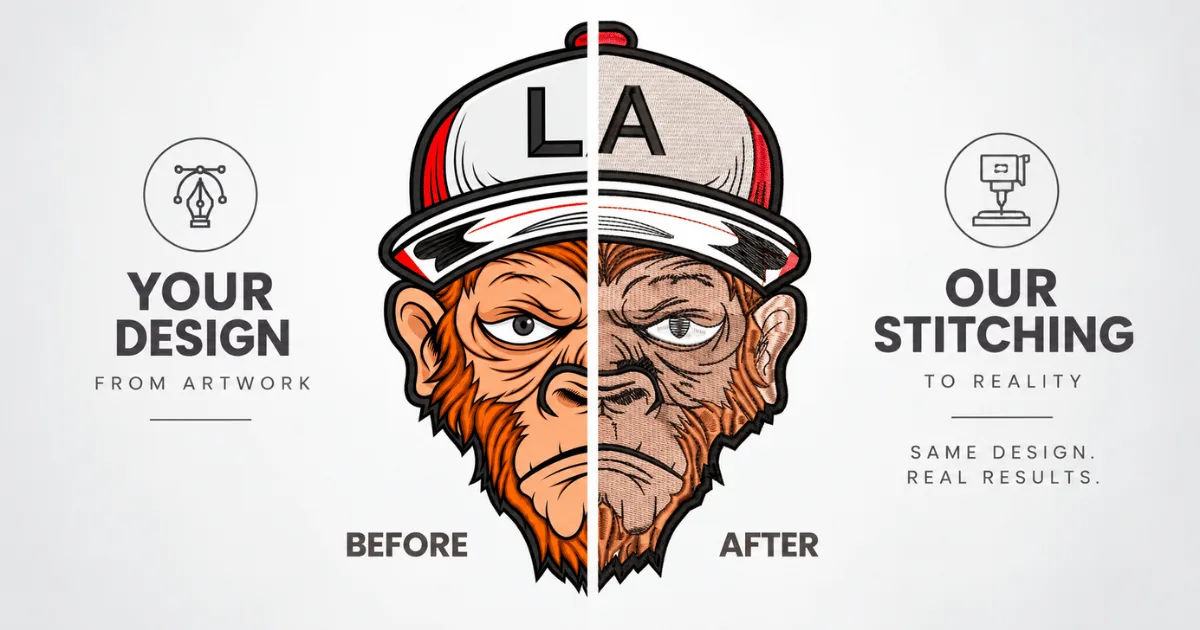
A skilled digitizer does not simply convert an image into stitches. They decide which stitch structure will produce clean, durable, and attractive results on the chosen fabric.This comprehensive guide explains the most commonly used stitch types, where they work best, their advantages and limitations, and how professional digitizers combine them to create high-quality embroidery.
Why Stitch Types Matter in Embroidery
Embroidery is fundamentally different from printing. A printed design places ink or another medium on the surface of fabric, while embroidery builds the design with thread.
Every section of an embroidered design must therefore be translated into a sequence of needle movements. The stitch type determines how thread covers an area, follows a line, creates an edge, or produces texture.
Choosing the wrong stitch can cause several problems. Fabric may pucker, lettering may become difficult to read, thin lines may disappear, or large areas may look uneven.
A professional approach considers the artwork, fabric, thread, design size, and intended use before selecting stitches.
Main Stitch Types Used in Embroidery Digitizing
Several stitch types are used regularly in professional embroidery. The three fundamental categories are running stitches, satin stitches, and fill stitches. Other specialized structures are often created by modifying or combining these basic stitch types.
Running Stitch
A running stitch is one of the simplest embroidery structures. It creates a thin line by moving the needle along a defined path.
Running stitches are commonly used for:
- Fine outlines
- Small details
- Sketch-style artwork
- Thin lettering
- Borders
- Decorative lines
- Underlay structures
- Detail work inside larger designs
Because the thread follows a narrow path, running stitches do not provide the same coverage as satin or fill stitches.
Their biggest advantage is precision. A digitizer can use them to reproduce delicate details without adding unnecessary thread density.
However, running stitches have limitations. If a line is too thin or the design is too small, the thread may not create enough visual weight. On certain fabrics, extremely fine running stitches can also become less noticeable.
Single Running Stitch
A single running stitch uses one line of stitching to create the design element. It is useful for lightweight outlines and fine details.
For example, a small illustration might use a single running stitch for facial features, veins in leaves, or narrow internal lines.
The digitizer must consider stitch length carefully. Extremely short stitches can create excessive needle penetrations, while excessively long stitches may appear loose or uneven.
Triple Running Stitch
A triple running stitch reinforces a line by passing over the same route multiple times.
It produces a stronger and more noticeable line than a single running stitch. This makes it useful for decorative outlines, technical-looking artwork, and designs where additional definition is required.
Because it adds more thread and needle movement, it should not be used unnecessarily throughout an entire design.
Satin Stitch
The satin stitch is one of the most recognizable stitch types in machine embroidery. It consists of closely spaced stitches running back and forth across a narrow shape.
Satin stitches are particularly effective for:
- Lettering
- Borders
- Narrow columns
- Outlines
- Small decorative shapes
- Monograms
- Smooth edges
A major benefit of satin stitching is its smooth and slightly raised appearance. When used correctly, it can give embroidery a polished and professional finish.
Satin stitches are especially popular for embroidered names and logos because they create clean edges and strong visual contrast.
Satin Stitch for Lettering
Embroidery lettering often depends heavily on satin stitches. The stitch direction, density, and width must be carefully controlled so that letters remain readable.
If satin columns are too wide, the thread may pull excessively and create distortion. If they are too narrow, the embroidery may not have enough coverage.
Small lettering presents another challenge. Tiny letters cannot always support the same stitch structures as larger text. Professional digitizers often simplify small lettering to preserve readability.
Satin Stitch Width
Satin stitches work best within suitable width ranges. Extremely wide satin columns can create long stitches that may snag or become unstable.
When a shape becomes too wide, a fill stitch may be more appropriate. The digitizer may also divide the shape into multiple sections to maintain consistent stitch quality.
Fill Stitch
Fill stitches are used to cover larger areas with thread. Instead of creating a narrow column, fill stitches cover a defined region using rows of stitching.
They are commonly used for:
- Large logos
- Background areas
- Clothing graphics
- Patches
- Large symbols
- Broad shapes
- Decorative artwork
Fill stitches can create substantial coverage while maintaining a consistent appearance.
A good digitizer adjusts stitch density according to the fabric, thread, design size, and desired finish.
Tatami Fill
Tatami is one of the most common fill structures in machine embroidery. It consists of rows of stitches arranged in a pattern that provides coverage over larger areas.
Tatami fills can be adjusted to create different textures and visual effects. The spacing and stitch arrangement influence how the finished area looks.
Tatami is especially useful for large shapes where satin stitching would be impractical.
Poorly planned tatami fills can produce excessive density, thread buildup, or puckering. Proper stitch planning is therefore essential.
Underlay Stitches
Underlay is not usually the visible finishing stitch, but it plays an important role in professional embroidery.
Underlay stitches are placed underneath the main stitches to stabilize the fabric and prepare the surface for the top layer.
Common underlay functions include:
- Stabilizing fabric
- Supporting top stitches
- Improving coverage
- Reducing distortion
- Creating a smoother embroidery surface
- Helping stitches maintain their intended shape
Different underlay patterns are suitable for different situations.
Edge Run Underlay
Edge run stitching follows the boundary of a shape. It helps define the edge and provides support for the stitches placed above it.
This can be particularly useful for satin columns and shapes requiring clean borders.
Center Run Underlay
Center run underlay places supporting stitches through the middle of a shape.
It can provide structure beneath narrow columns and lettering without adding unnecessary coverage across the entire area.
Zigzag Underlay
Zigzag underlay creates a broader supporting structure beneath the top stitches.
It is often useful when additional stabilization and coverage are required. The exact underlay combination depends on the fabric and design.
Decorative Stitch Types
Beyond the basic structures, embroidery digitizing can use specialized stitches to create texture and artistic effects.
Motif Stitches
Motif stitches repeat a predefined decorative pattern along a line or within a selected area.
They can create attractive borders, ornamental details, and repeated shapes. Motif stitches are especially useful for decorative fashion embroidery.
Cross Stitches
Cross stitches create an X-shaped appearance and can be used for traditional or decorative designs.
Although they are less common in standard logo embroidery, they are useful for specific artistic styles and heritage-inspired designs.
Stipple Stitching
Stipple stitching creates a textured effect using irregular or controlled running-stitch movements.
It can be used for backgrounds, shading, decorative textures, and artistic embroidery. Stipple effects can make a design look less mechanically uniform.
How Digitizers Combine Different Stitch Types
A professional embroidery design rarely relies on only one stitch type.
Consider a company logo containing large letters, a thin outline, and a central symbol. The large letters might use satin or fill stitching. The outline could use a running stitch, while the central symbol might require a combination of satin and fill stitches.
This combination creates visual hierarchy.
The stitch direction can also change between sections. Changing stitch angles can help distinguish different shapes and prevent the embroidery from looking flat.
Experienced digitizers plan the entire stitch sequence before finalizing the design.
Stitch Direction and Its Importance
Stitch direction is an important part of embroidery design.
When stitches follow the natural shape of an object, the embroidery often appears more dimensional and polished. For example, curved leaves may benefit from stitch directions that follow their form rather than using the same direction throughout the design.
Changing stitch direction can also help separate adjacent sections.
However, excessive changes can make the design unnecessarily complicated. The goal is controlled variation rather than random movement.
Stitch Density and Coverage
Stitch density refers to how closely stitches are placed together.
Higher density generally produces stronger coverage, but more stitches are not automatically better. Excessive density can cause:
- Fabric puckering
- Thread buildup
- Needle stress
- Design distortion
- Heavy embroidery
- Longer production times
Too little density can create gaps and allow the fabric underneath to show through.
Good Embroidery Digitizing balances coverage with fabric behavior and design requirements.
Choosing Stitches for Different Fabrics
Fabric has a major influence on stitch selection.
Cotton
Cotton fabrics generally provide a stable surface, making them suitable for many standard embroidery structures. However, lightweight cotton can still require careful stabilization.
Stretch Fabrics
Stretchy materials require additional consideration because the fabric can move during stitching. Appropriate underlay and density help maintain design stability.
Denim
Denim is relatively durable and can support substantial embroidery. Dense fills and bold satin stitching can work well when properly digitized.
Caps
Caps present special challenges because of their curved shape and limited stitching area. Designs intended for caps often require careful stitch sequencing, suitable underlay, and adjustments to accommodate the crown's shape.
Stitch Types for Small Designs
Small embroidery requires careful simplification.
A design that looks detailed on a computer screen may not reproduce clearly at a small physical size. Tiny details may need to be removed, enlarged, or converted into simpler stitch structures.
Running stitches can be effective for fine details, while satin stitches work well for compact lettering and narrow shapes.
Fill stitches should be used carefully because dense areas can become too heavy at small dimensions.
Stitch Types for Large Designs
Large designs provide more room for detail but create other challenges.
Large fill areas can accumulate substantial thread. If density is too high, the garment may become stiff or puckered.
Professional digitizers often divide large areas into logical sections and use appropriate underlay to control fabric movement.
They may also use different stitch directions to improve appearance and reduce tension problems.
Common Stitching Problems and Their Causes
Understanding stitch types also helps identify embroidery problems.
Puckering
Puckering occurs when the fabric gathers around the embroidered area. It can result from excessive density, inadequate stabilization, unsuitable underlay, or incorrect tension.
Gaps
Visible fabric gaps can occur when density is too low or when the design has not been properly compensated for fabric movement.
Uneven Satin Stitches
Uneven satin columns may result from incorrect stitch spacing, excessive width, poor digitizing, or unsuitable stitch angles.
Poor Small Lettering
Small text can become unreadable when letters are too detailed or narrow. Simplifying the lettering and selecting appropriate stitch structures can improve the final result.
How Professional Digitizing Improves Stitch Quality
Good embroidery begins with thoughtful digitizing rather than simply converting an image automatically.
A professional digitizer studies the artwork and determines how each element should be constructed. They consider stitch type, density, direction, underlay, sequencing, pull compensation, and fabric behavior.
They also understand that the same design may require adjustments for different products.
A logo intended for a cotton polo may need different settings from the same logo embroidered on a cap or jacket.
Manual vs. Automatic Stitch Selection
Modern embroidery software can automatically generate stitches from artwork. This can save time, especially for simple designs.
However, automatic conversion does not always produce production-ready results.
Software may create excessive stitch density, awkward stitch directions, unnecessary jumps, or poor small details.
Manual editing remains valuable because experienced digitizers can adjust individual sections according to the actual requirements of the design.
Testing and Adjusting the Embroidery Design
A design should ideally be tested before large-scale production.
A sample stitch-out allows the digitizer to evaluate:
- Thread coverage
- Stitch density
- Letter readability
- Fabric distortion
- Color transitions
- Stitch direction
- Overall appearance
If problems appear, the digitizer can modify the file and test it again.
This process is especially important for complex logos, small lettering, unusual fabrics, and large embroidery designs.
Conclusion
Understanding stitch types is essential for producing professional machine embroidery. Running stitches provide fine lines and delicate details, satin stitches create smooth columns and strong lettering, while fill stitches cover larger areas effectively. Underlay stitches provide essential structural support beneath visible embroidery, while decorative techniques can add texture and character.
The best results come from combining these stitch types intelligently. There is no single stitch that works perfectly for every shape, fabric, or design. Each element must be evaluated based on its size, purpose, material, and desired appearance.
Professional Embroidery Digitizing is therefore both a technical process and a creative skill. A well-digitized design considers how thread behaves, how fabric responds to needle penetration, and how different stitch structures work together.
Whether the final product is a corporate uniform, embroidered cap, jacket, patch, promotional item, or custom garment, careful stitch selection can make a major difference. When the correct stitches, density, direction, underlay, and sequencing are combined, digital artwork can become clean, durable, and visually impressive embroidery.